


.webp)
When you have to get a grasp of how exactly a user will navigate your product or its features during UX design, you should always look to get into high-level user flows. User flows give a description of the whole user path through the product via digital visualization. It helps to determine how many screen layouts are needed, what order they should appear, and what components need to be present.
This eventually ensures your final product design is highly qualified, convenient, and absolutely usable.
1. What exactly is User flow though?
2. Is User Flows necessary?
3. What’s the difference between user flows and user journeys?
4. How do we actually use user flows in the design stage?
Follow us closely as we give detailed answers to all your user flow curiosity and also give you a detailed element-by-element guide to creating user flows of the highest standard.
Are you ready? Let’s get started.
1. What is User Flow?
User flow is a digital or written visualization of the options that can be performed during the app or website use. This flow starts when a user enters the product and gets to the home screen or page, and finishes when a user performs the final act like ordering the product and signing up. User flow visualization makes it possible to analyze and improve user experience and general app rates.
2. Is User Flows necessary?
Well, user flows are probably not necessary, but if you desire great user experiences with your product design, it’s absolutely important and crucial. User flow helps to monitor how effective UX design is through the analysis of users’ behaviors as they interact with your product. It requires constant tweaks and improvements to ensure users' expectations are always met. User flows are of great benefit when you want to build or rebuild an app or website.
Let’s take a look at some situations where UX flows are essential.
- Creating an intuitive interface: The more effective and easy your product design is, the more potential users settle to use or purchase your product. When it comes to the process of designing it to be effective and easy, It becomes much easier with user flows. User flows ensure the process of user interaction with the product is visualized and also evaluated before release.
For example:

- Evaluating existing interfaces: User flow helps not just products that are in the design phase but also apps or websites that have been launched. They help in the analysis and reporting of any deficiency or error. With user flows, you get to easily see what is what and fix them.
- Product presentation for clients: User flows provide an in-depth view of the sequence of actions a user will take when using a product. With user flows, a client can get an in-depth grasp of what is being designed before execution.
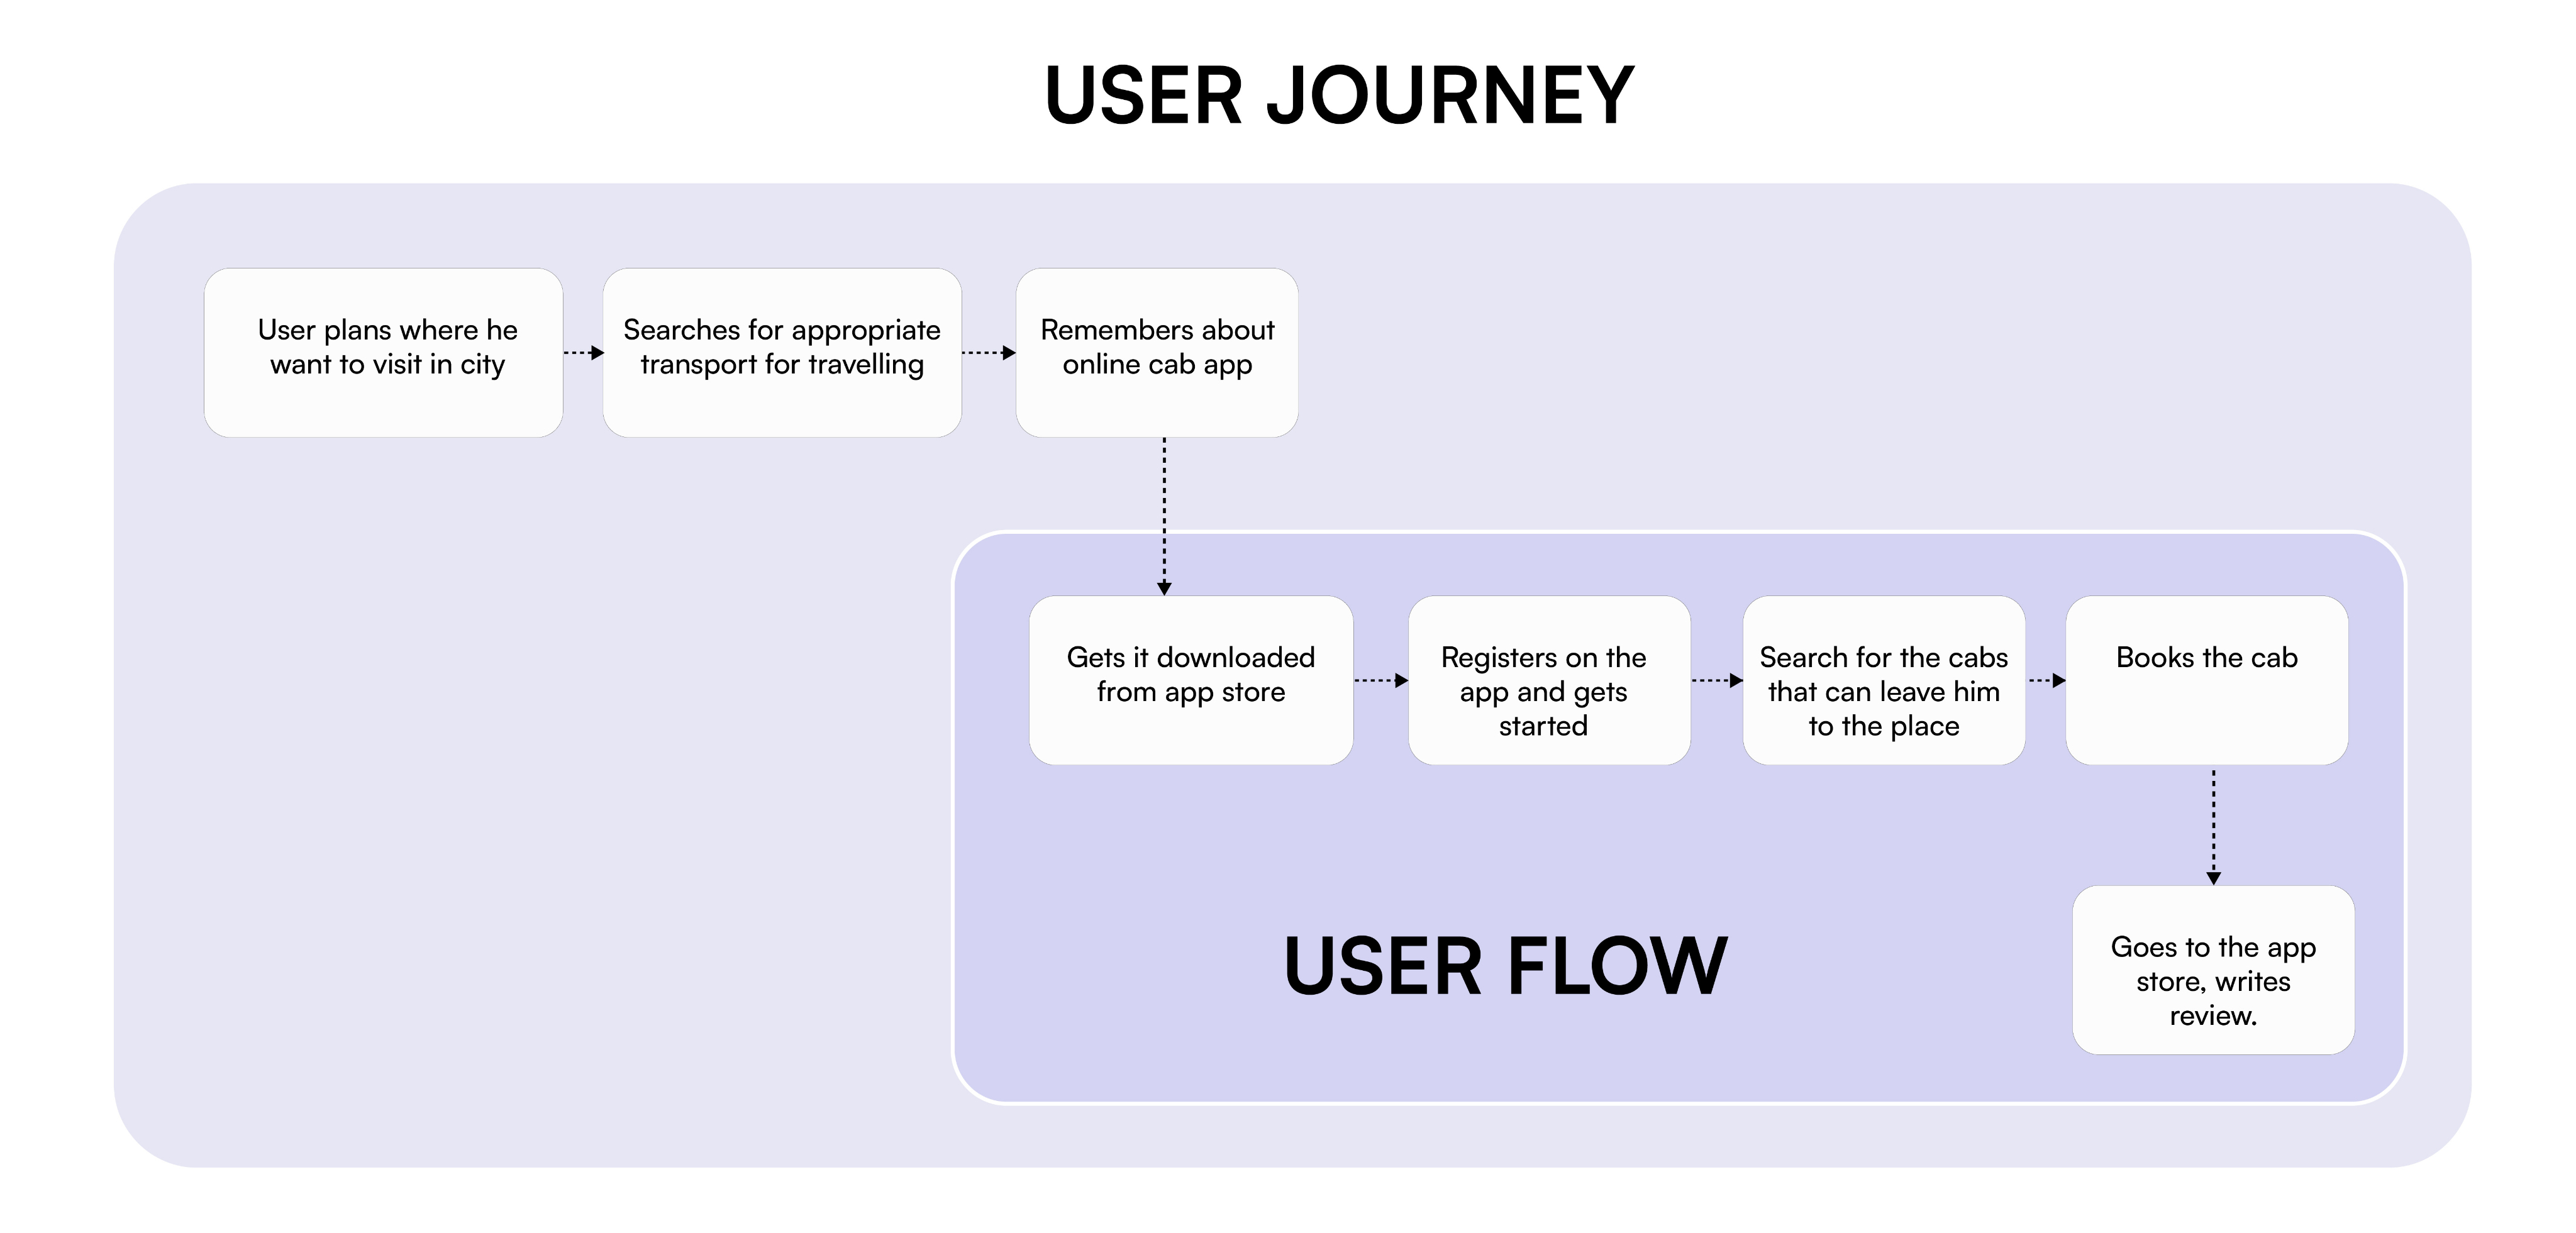
3. What’s the difference between user flows and user journeys?
User flows or user flow diagrams are normally boxes and arrows, they follow the steps or stages a user takes through a given feature set or objective.
User journeys are based on one user’s journey through your product, they are usually more high-level and contain an end-to-end experience. User flows are used primarily for new features and ideas and go into task breakdown.
User journeys are best created by your entire product team via a workshop and contain information on key stages, user goals, screens, pain points, insights, and ideas. This article will focus on user flows, you can see an example user journey below.
4. How exactly to use user flows in the design stage?
There is actually no right time for user flow implementation in the design stage. It is most times integrated before the first sketches. However, there are several tips that are worth considering in the creation of user flows.
- User research and competitor analysis: To begin with, you have to define the specifications of future solutions like client requirements, user expectations, solution objectives, etc. After the solution aims at identification, it is high time to start analyzing competitors. It is a useful step to check competitors’ designs and their user flows through interaction with their products, defining the most beneficial and disadvantageous ideas. You can also make some sketches of their user flows as the visual analysis is much more efficient. Considering all the strong and weak points, you are ready to start your own user flow drawing.
- User flow chart interface: Initially, user flow doesn’t have to look complex and confusing. Each drawn element corresponds to a particular action. Usually, designers use specific marks like circles, squares, and diamonds. Each figure describes the future option like login, registration, and the following steps. These flows demonstrate several screen schemes.
- Wireflow interface: First sketches can be written or made digitally, it is up to designers. Due to modern technologies, there is a wide range of available tools for drawing user flows. These tools provide wireframing for the user flows. Therefore, wireframes can be placed instead of marks that designers have drawn before.
- Creating user flow interface: As soon as the flow is identified, it comes to the final stage – creating a design prototype. Adding the ready screens to the user flow makes it more understandable for the client and shows the entire design overview and options. This phase implies the experience the user is going to have using the app or website. This practice can be applied to each user flow to see the final result.
DETAILED Element-by-element guide to USER FLOWS:
- START POINT AND FINISH POINT
Always have a green start and a red end element, this helps you show clearly where the journey starts and ends. Be sure to outline at the start where the start or entry point actually is. For example, it could be your product home page, a profile page, or a Facebook advert.
- RECTANGLE STEPS
You can represent high-level stages with simple rectangles.
- DECISION DIAMONDS
If ever the user needs to make a decision to move through the flow then we use a decision diamond where yes takes us forward and no takes us back to another step. It’s good to use green for yes and red for no to show the different routes clearly.
- DATA INPUT ELEMENTS
We use a slanted square for text input, this is used when a user needs to actually input text or data into a form.
- SYSTEM ACTIONS CIRCLE
Using a checkered circle for system tasks is a way to differentiate them from user tasks. When there is something the system needs to do based on a user action then it makes sense to show that on our user flows.
- SELECT ELEMENTS
For detailed user flows it is often helpful to show when a user actually needs to make a selection on a button or similar, using the select rectangle we can see how many actions the user needs to take.
- ICONS
You can also use icons to show detail around some actions like an email being sent, a google advert, or a website icon.
- WIREFLOWS
If you have sketches or wireframes already prepared you can also use them to create user flows, they can show even more detail and specifics on the design. They would usually be the step after your initial user flows and would use your low-fidelity wireframes.
- PAGE SCREENSHOTS
You can also use screenshots to accompany user flows if you are showing screens that already exist in your product or website.
To wrap it all up,
User flows are part of your final deliverables and help stakeholders understand the value of the idea and understand how they affect the users through processes and actions. Keep in mind that user flows are often revisited and edited so you will always be updating them and keeping them current.
Once you have good user research and understand your pain points and business objectives you can begin to map out user flows. Start with a high-level one and then progress into a detailed user flow (task flow) that should eventually lead to a low-fidelity wireframe and wire flows.
Have a go at making one and let us know how it goes!
Want to receive regular updates on Product design, Web design, UI/UX?
SUBSCRIBE to our newsletter Today!
.webp)


